Archive
JavaScript resources for Delphi and Smart Pascal developers
Just like knowing assembly programming gives Delphi and C++ developers that extra edge, so does knowing JavaScript for Smart Pascal.

JavaScript can be a frustrating language when coming from the safety and structured heaven of C++ builder or Delphi. JavaScript lack pretty much all the fundamental features of OOP, things Delphi and C++ builder users regard as “standard” and fundamental.
Thankfully there is a wealth of online resources for learning JavaScript. Most of them completely free of charge. You can learn at your own pace and as your insight into JavaScript grows, the more you will appreciate Smart Pascal.
JavaScript is one of those languages that everyone should just know. Even if you work purely in Delphi and write native websites (Webbroker, Websnap, Apache or IIS, Delphi and C++ builder has a lot to offer) knowing JavaScript will help you write better websites and more elegant solutions. So it’s not just a benefit for Smart Pascal, but for native Delphi as well.
Quirksmode
This is a website I came across earlier but forgot to mention at the time. Rather than just dumping a ton of information lists in your lap, the author deals with each topic in a clear and straight-forward manner. His articles are also written in human form, so it has a bit of warmth to it (at least a lot better than W3Schools, which is primarily hard-core information). So head over to Quirksmode and have a look!
Aptana
If you don’t own Smart Mobile Studio and just want to learn JavaScript on the side – you have a ton of options. Most JS developers have moved into Visual Studio or Sublime by now, but there is another, much better alternative (in my view) and that is a free IDE called Aptana.

For pure JS work, Aptana is my favorite. Smart Mobile Studio is created for web applications in object pascal. Aptana is designed for classical web-pages and associated languages.
Aptana is my personal favorite outside of Smart Mobile Studio. It supports more than just JavaScript. If python is your thing then this is one of the better; same with ruby on rails, java and php. Aptana supports all of these out of the box – and there are plenty of plugin features around.
Note: If you are old enough to remember Homesite, which was the #1 HTML/JS editor some 15-18 years ago (today a part of the Adobe Dreamweaver family) then Aptana will be similar but much more advanced. Oh and Homesite was written in Delphi 🙂
Using Smart Pascal for free
Smart Mobile Studio is not just the compiler. The most time-consuming and consequently valuable part of Smart Mobile Studio, is the RTL control architecture, libraries and API’s that have taken years to establish. But you can download and use the command-line compiler without our RTL and ide, as long as you stick to some basic rules:
- You cannot use it for commercial projects
- It is illegal to use it in a competing product
- It is forbidden to use in a production environment
- And naturally you are not allowed to misrepresent or distribute copies
This is pretty much the same rules all companies apply to their product when aspects of it is distributed for free.
But for learning what the compiler does, enjoy oop and all the fancy things object pascal has to offer, well then you can start out with the command-line compiler and later upgrade to a commercial license.
Well, check out the resources and enjoy JavaScript!
Resources
Delayed execution for Delphi

The Dispatch class is made to mimic the behavior of TW3Dispatch in the Smart Pascal RTL, which is based on WC3 DOM behavior
One of the features I really miss when using Delphi, is TW3Dispatch from Smart Mobile Studio. It makes it so easy to schedule code to execute. In Delphi you either have to call the Windows API directly, use a TTimer or spawn a thread to achieve the same. Well now there is one for Delphi as well!
Now I did make a version of this library earlier which was VCL only (using the Windows API) but lately I decided to upgrade it to use threads – and thus the library is now platform independent and FMX compatible.
Delayed execution?
Ok let’s take a practical example. Let’s say you want to display a welcome form when your application starts; or actually – a few milliseconds after the main form has appeared on screen. How would you solve that?
Most people slap a TTimer on the main form, set a suitable delay and define Active as true. Then in the OnTimer() event they just disable the timer and do their thing.
Another practical example is ordinary button clicks. For most normal tasks the ordinary OnClick event works fine. But there are times where you may want to delay execution of “something” until after the OnClick event has finished. Especially if you are doing asynchronous calls to a server (for instance).
If you are going to use TTimer for stuff like that, even if you isolate it in functions, you are going to go insane sooner rather than later.
With my library it’s a one-liner:
TQTXDispatch.Execute( procedure ()
  begin
    StartDownload();
  end, 200);
Or, if you want to run through some steps you can use a repeater:
TQTXDispatch.RepeatExecute( function (): boolean
  begin
    result := DoNextStep;
  end, 200, 64); // repeat 64 times with 200ms interval
There is also a ExecuteEx() method that returns a handle, which you can then use to cancel a pending execution with AbortExecute().
Porting code between Smart and Delphi
While I can think of 100 uses alone for the library in Delphi, my primary motivation is making it easier to port code between Delphi and Smart. And TW3Dispatch can be tricky to “slap together” or “quickly adjust” to make code compile on both platforms. So hopefully this will help!
unit qtx.utils.callback;

//#############################################################################
//
// Unit:      Windows callback mechanism
// Author:    Jon Lennart Aasenden
// Copyright: Jon Lennart Aasenden, Quartex Components
// Website:   http://www.quartexcomponents.com
//#############################################################################
//
//  Purpose:
//    This unit provides methods for blocking delay of program execution,
//    and also a non-blocking callback function for anonymous methods.
//
//  The TQTXCallback.Delay() method is blocking, meaning that it will halt
//  program execution for the duration of the MS parameter.
//
//  The TQTXCallback.Callback() method is NON-blocking, meaning that it will
//  create a winAPI time object that, when the duration of MS is expired,
//  will execute the inline anonymous function.
//
//  NOTE: There are two overloaded versions: One for anonymous methods,
//        and another for object methods (when used within a class).
//
//  Example:
//     TQTXCallback.callback(
//        procedure (
//          begin
//            showmessage('2 seconds have gone by');
//          end,
//     2000);
//
//
//     TQTXCallback.delay(nil,4000);
//     showmessage('4 seconds have gone by');
//
//
//#############################################################################

interface

uses  System.SysUtils, System.Classes,
      Winapi.Windows, System.Generics.Collections;

// Toggle this to use WinAPI only, VCL restricted (!)
{$DEFINE USE_THREADS}

type
[weak]
TQTXObjectProc = procedure of object;
TQTXRepeatFunc = function (): boolean;

TQTXDispatch = Class
public
  (* Anonymous method implementation *)
  class procedure Execute(const aCallback: TProc; const ms: Cardinal); overload;
  class procedure Execute(const aCallback: TQTXObjectProc;
        const ms: Cardinal);Overload;

  class function  ExecuteEx(const aCallBack:TProc; const ms: Cardinal):THandle;
  class procedure AbortExecute(const aHandle: THandle);

  class procedure RepeatExecute(const Entrypoint: TQTXRepeatFunc; const ms: cardinal; Rounds: integer);

  class function GetTickCount: Cardinal;

  (* Object method implementation *)
  class procedure Delay(const aCallback: TProc; const ms: Cardinal);overload;
  class Procedure Delay(const aCallback: TQTXObjectProc;
        const ms:Cardinal);overload;
end;

implementation

{$IFNDEF FMX}
uses Vcl.Forms;
{$ELSE}
uses Fmx.Forms;
{$ENDIF}

type

TQTXDispatchThread = class(TThread)
strict private
  FCBAnon:  TThreadProcedure;
  FCBObj:   TQTXObjectProc;
  FDelay:   integer;
  FObjCall: boolean;
  fid: integer;
protected
  procedure ObjCallback;
  procedure Execute; override;
public
  property Id: integer read FId write FId;
  constructor Create(ms: integer; Callback: TThreadProcedure); overload;
  constructor Create(ms: integer; Callback: TQTXObjectProc); overload;
end;

TThreadDictionary = class(TDictionary<integer, TQTXDispatchThread>)
public
  procedure ThreadFinished(Sender: TObject);
end;

procedure TThreadDictionary.ThreadFinished(Sender: TObject);
var
  LId: integer;
begin
  if assigned(sender) then
  begin
    if assigned(self) then
    begin
      LId := TQTXDispatchThread(sender).Id;
      self.Remove(LId);
    end;
  end;
end;

var
{$IFDEF USE_THREADS}
_LUT: TThreadDictionary;
{$ELSE}
_LUT: TDictionary<UINT, TProc>;
{$ENDIF}
_TED: integer;

function QTXProgramEnded: boolean;
begin
  result := not assigned(application);
  if not result then
  result := application.terminated;
end;

//#############################################################################
// TQTXDispatchThread
//#############################################################################

constructor TQTXDispatchThread.Create(ms: integer; Callback: TQTXObjectProc);
begin
  inherited Create(true);
  FCBObj := Callback;
  FObjCall := true;
  FDelay := ms;
end;

constructor TQTXDispatchThread.Create(ms: integer; Callback: TThreadProcedure);
begin
  inherited Create(true);
  FCBAnon := Callback;
  FObjCall := false;
  FDelay := ms;
end;

procedure TQTXDispatchThread.ObjCallback;
begin
  if not QTXProgramEnded then
  FCBObj();
end;

procedure TQTXDispatchThread.Execute;
begin

  repeat
    sleep(1);
    dec(FDelay);
    if FDelay<1 then     begin       break;     end;   until terminated;   if not terminated then   begin     try       case FObjCall of       false:         begin           try             if assigned(FCBAnon) then             TThread.Queue(nil, FCBAnon);           except             on exception do;           end;         end;       true:         begin           try             Synchronize(ObjCallback);           except             on exception do;           end;         end;       end;     finally       terminate;     end;   end; end; //############################################################################# // TQTXDispatch //############################################################################# class function TQTXDispatch.GetTickCount: Cardinal; begin   result := TThread.GetTickCount; end; class procedure TQTXDispatch.RepeatExecute(const Entrypoint: TQTXRepeatFunc;   const ms: cardinal; Rounds: integer); begin   if assigned(Entrypoint) then   begin     if (ms >0) and (Rounds >0) then
    begin
      if not QTXProgramEnded then
      begin
        Execute(procedure ()
        begin
          if Entrypoint() then
          begin
            RepeatExecute(Entrypoint, ms, Rounds -1);
          end;
        end, ms);
      end;
    end;
  end;
end;

class procedure TQTXDispatch.Execute(const aCallback: TProc; const ms: Cardinal);
  {$IFNDEF USE_THREADS}
  procedure w3_invoke(hwnd: HWND; uMsg: UINT;
            idEvent: UINT_PTR;dwTime: DWORD);stdcall;
  var
    mProc:  TProc;
  begin
    KillTimer(0,idEvent);
    try
      if assigned(_LUT) then
      begin
        mproc:=_lut.Items[idEvent];
        _lut.Remove(idEvent);
        if assigned(mProc) then
        mproc;
      end;
    except
      on exception do;
    end;
  end;
  {$ENDIF}

{$IFDEF USE_THREADS}
var
  LThread: TQTXDispatchThread;
{$ENDIF}
begin
  if Assigned(_LUT) then
  {$IFDEF USE_THREADS}
  begin
    inc(_TED);
    LThread := TQTXDispatchThread.Create(ms,TThreadProcedure(aCallback));
    LThread.FreeOnTerminate := true;
    LThread.Id := _TED;
    LThread.OnTerminate := _LUT.ThreadFinished;
    _LUT.Add(_TED, LThread);
    LThread.Start;
  end;
  {$ELSE}
  _LUT.add(SetTimer(0,0,ms,@w3_invoke),aCallback);
  {$ENDIF}
end;

class function TQTXDispatch.ExecuteEx(const aCallBack: TProc;
  const ms: Cardinal): THandle;

 {$IFNDEF USE_THREADS}
  procedure w3_invoke(hwnd: HWND; uMsg: UINT;
            idEvent: UINT_PTR;dwTime: DWORD);stdcall;
  var
    mProc:  TProc;
  begin
    KillTimer(0,idEvent);
    try
      if assigned(_LUT) then
      begin
        mproc:=_lut.Items[idEvent];
        _lut.Remove(idEvent);
        if assigned(mProc) then
        mproc;
      end;
    except
      on exception do;
    end;
  end;
  {$ENDIF}

{$IFDEF USE_THREADS}
var
  LThread: TQTXDispatchThread;
{$ENDIF}
begin
  result := 0;
  if Assigned(_LUT) then
  begin
    {$IFDEF USE_THREADS}
    inc(_TED);
    result := _TED;

    LThread := TQTXDispatchThread.Create(ms, TThreadProcedure(aCallback));
    LThread.FreeOnTerminate := true;
    LThread.Id := result;
    LThread.OnTerminate := _LUT.ThreadFinished;
    _LUT.Add(result, LThread);
    LThread.Start;
    {$ELSE}
    result := SetTimer(0,0,ms,@w3_invoke);
    _LUT.Add(result,aCallback);
    {$ENDIF}
  end;
end;

class procedure TQTXDispatch.AbortExecute(const aHandle: THandle);
var
  LInstance: TQTXDispatchThread;
begin
  if assigned(_LUT)
  and _LUT.ContainsKey(aHandle) then
  begin
  {$IFDEF USE_THREADS}
    if _lut.TryGetValue(aHandle, LInstance) then
    begin
      if not LInstance.Terminated then
      LInstance.Terminate;
    end;
  {$ELSE}
    _lut.Remove(aHandle);
    KillTimer(0,aHandle);
  {$ENDIF}
  end;
end;

class procedure TQTXDispatch.Execute(const aCallback: TQTXObjectProc;
  const ms: cardinal);

  {$IFNDEF USE_THREADS}
  procedure w3_invoke(hwnd: HWND; uMsg: UINT;
            idEvent: UINT_PTR;dwTime: DWORD);stdcall;
  var
    mProc:  TProc;
  begin
    KillTimer(0,idEvent);
    try
      if assigned(_LUT) then
      begin
        mproc:=_lut.Items[idEvent];
        _lut.Remove(idEvent);
        if assigned(mProc) then
        mproc;
      end;
    except
      on exception do;
    end;
  end;
  {$ENDIF}

{$IFDEF USE_THREADS}
var
LThread: TQTXDispatchThread;
{$endif}
begin
  if Assigned(_LUT) then
  {$IFDEF USE_THREADS}
  begin
    LThread := TQTXDispatchThread.Create(ms, aCallback);
    LThread.FreeOnTerminate := true;
    LThread.OnTerminate := _LUT.ThreadFinished;
    inc(_TED);
    LThread.Id := _TED;
    _LUT.Add(LThread.Id, LThread);
    LThread.Start;
  end;
  {$ELSE}
  _LUT.add(SetTimer(0,0,ms,@w3_invoke),aCallback);
  {$ENDIF}
end;

class procedure TQTXDispatch.Delay(const aCallback: TProc;
      const ms: cardinal);
var
  LThen:  DWord;
begin
  if (not QTXProgramEnded) and (ms > 0) then
  begin
    try
      LThen := self.GetTickCount + ms;

      repeat
        Sleep(1);
        if QTXProgramEnded then
        break;
      until ( self.GetTickCount >= LThen );

      if assigned(aCallback) and (not QTXProgramEnded) then
      begin
        try
          aCallback;
        except
          on exception do;
        end;
      end;
    except
      on exception do;
    end;
  end;
end;

class procedure TQTXDispatch.Delay(const aCallback: TQTXObjectProc;
      const ms:Cardinal);
var
  LThen:  DWord;
begin
  if (not QTXProgramEnded) and (ms > 0) then
  begin
    try
      LThen := self.GetTickCount + ms;
      repeat
        Sleep(1);
        if QTXProgramEnded then
        break;
      until ( self.GetTickCount >= LThen );

      if assigned(aCallback) and (not QTXProgramEnded) then
      begin
        try
          aCallback;
        except
          on exception do;
        end;
      end;
    except
      on exception do;
    end;
  end;
end;

initialization
begin
{$IFDEF USE_THREADS}
  _LUT := TThreadDictionary.Create;
{$ELSE}
  _LUT := TDictionary<UINT,TProc>.Create;
{$ENDIF}
end;

finalization
begin
  if Assigned(_LUT) then
  FreeAndNil(_LUT);
end;

end.
Overclocking Raspberry PI 3, part 2
If you havent read my first installment then head back and read it here.
Right. Overclocking is not something that should be taken lightly. I have seen people get cpu-burn and basically kill their brand new Intel i7 CPU’s – effectively throwing well over a thousand dollars worth of gear straight out the window.
My idea of overclocking is not to push the cpu to the bleeding edge. Moderation is the keyword here. Its like when we were kids and bought trim-set’s for our mopeds and dirt-bikes. Filing down the intake on the cylinder and pumping more gasoline in could get that 50cc engine yielding 70 KPM rather than the default 50. But if you filed even 5mm too much, you could pretty much throw the whole cylinder in the thrash. And if you didn’t get a dedicated cylinder with better cooling — the whole engine would burn out.
The test
You can get some heavy-duty performance test-kits for Linux, but for moderate overclocking I find that practical, hands on testing works just as well. In my case I have used a simple JavaScript demo (actually a port of a JS68k demo to Smart Pascal) that I compiled on my PC and dumped on my server.
On my Raspberry PI I just start Chromium and let the demo run.
Without overclocking I get the following performance factors:
- 1-2 frames per second
- 46-57% CPU usage in task-manager
Preparing the hardware
I bought a simple, cheap set of 3 heat-sinks for around $2. So first order of the day is to get that attached to the 3 chips that more or less make up the Raspberry PI 3b.

Heatsinks + fans all humming nicely!
My son managed to play a cheap graphics card to death earlier, which just happened to have a small fan. So I took that fan and attached it to the heat-sink with a double-sided tape pad, then connected the power cords to the GPIO pins. This ensures a reasonable degree of cooling. Not top of the line liquid stuff – but a lot better than just heatsinks alone. And hey, it’s a $35 SoC, so heat sink pluss fan is pretty much giving it the royal treatment.

That’s one pimped up Amiga 500! 🙂
The settings
Next is to adjust the config file to perform the actual overclocking. Again, I stick to safe values. You could probably push this further by adjusting sdram read and write frequencies — but you may end up burning the whole thing to pieces. Also, the keyword here is “safe”. To much overclocking and the amount of computational errors actually renders the whole thing useless.

Not running out of SD card slots any time soon!
Start a command-line prompt and do:
cd ..
cd ..
cd boot
sudo nano config.txt
Now scroll down until you find
#uncomment to overclock the arm. 700 MHz is the default.
Replace the values there with:
#uncomment to overclock the arm. 700 MHz is the default.
arm_freq=1350
over_voltage=5
sdram_freq=500
gpu_freq=500
core_freq=575
Next, hit CTRL+X, press Y, then enter to save the file. Now type:
reboot
Performance test
Now simply start Chromium again and run the demo. The performance have now gone up quite considerably:
- 8-9 frames per second
- 42% CPU usage in task-manager

From 1-2 FPS to 8-9 is actually a MASSIVE speedup
Now let’s check the temp. From what I read, the core will blow at around 80 degrees, so no matter what you decide to do – make sure it stays well below that.
Open up a command-line prompt and type the following:
/opt/vc/bin/vcgencmd measure_temp
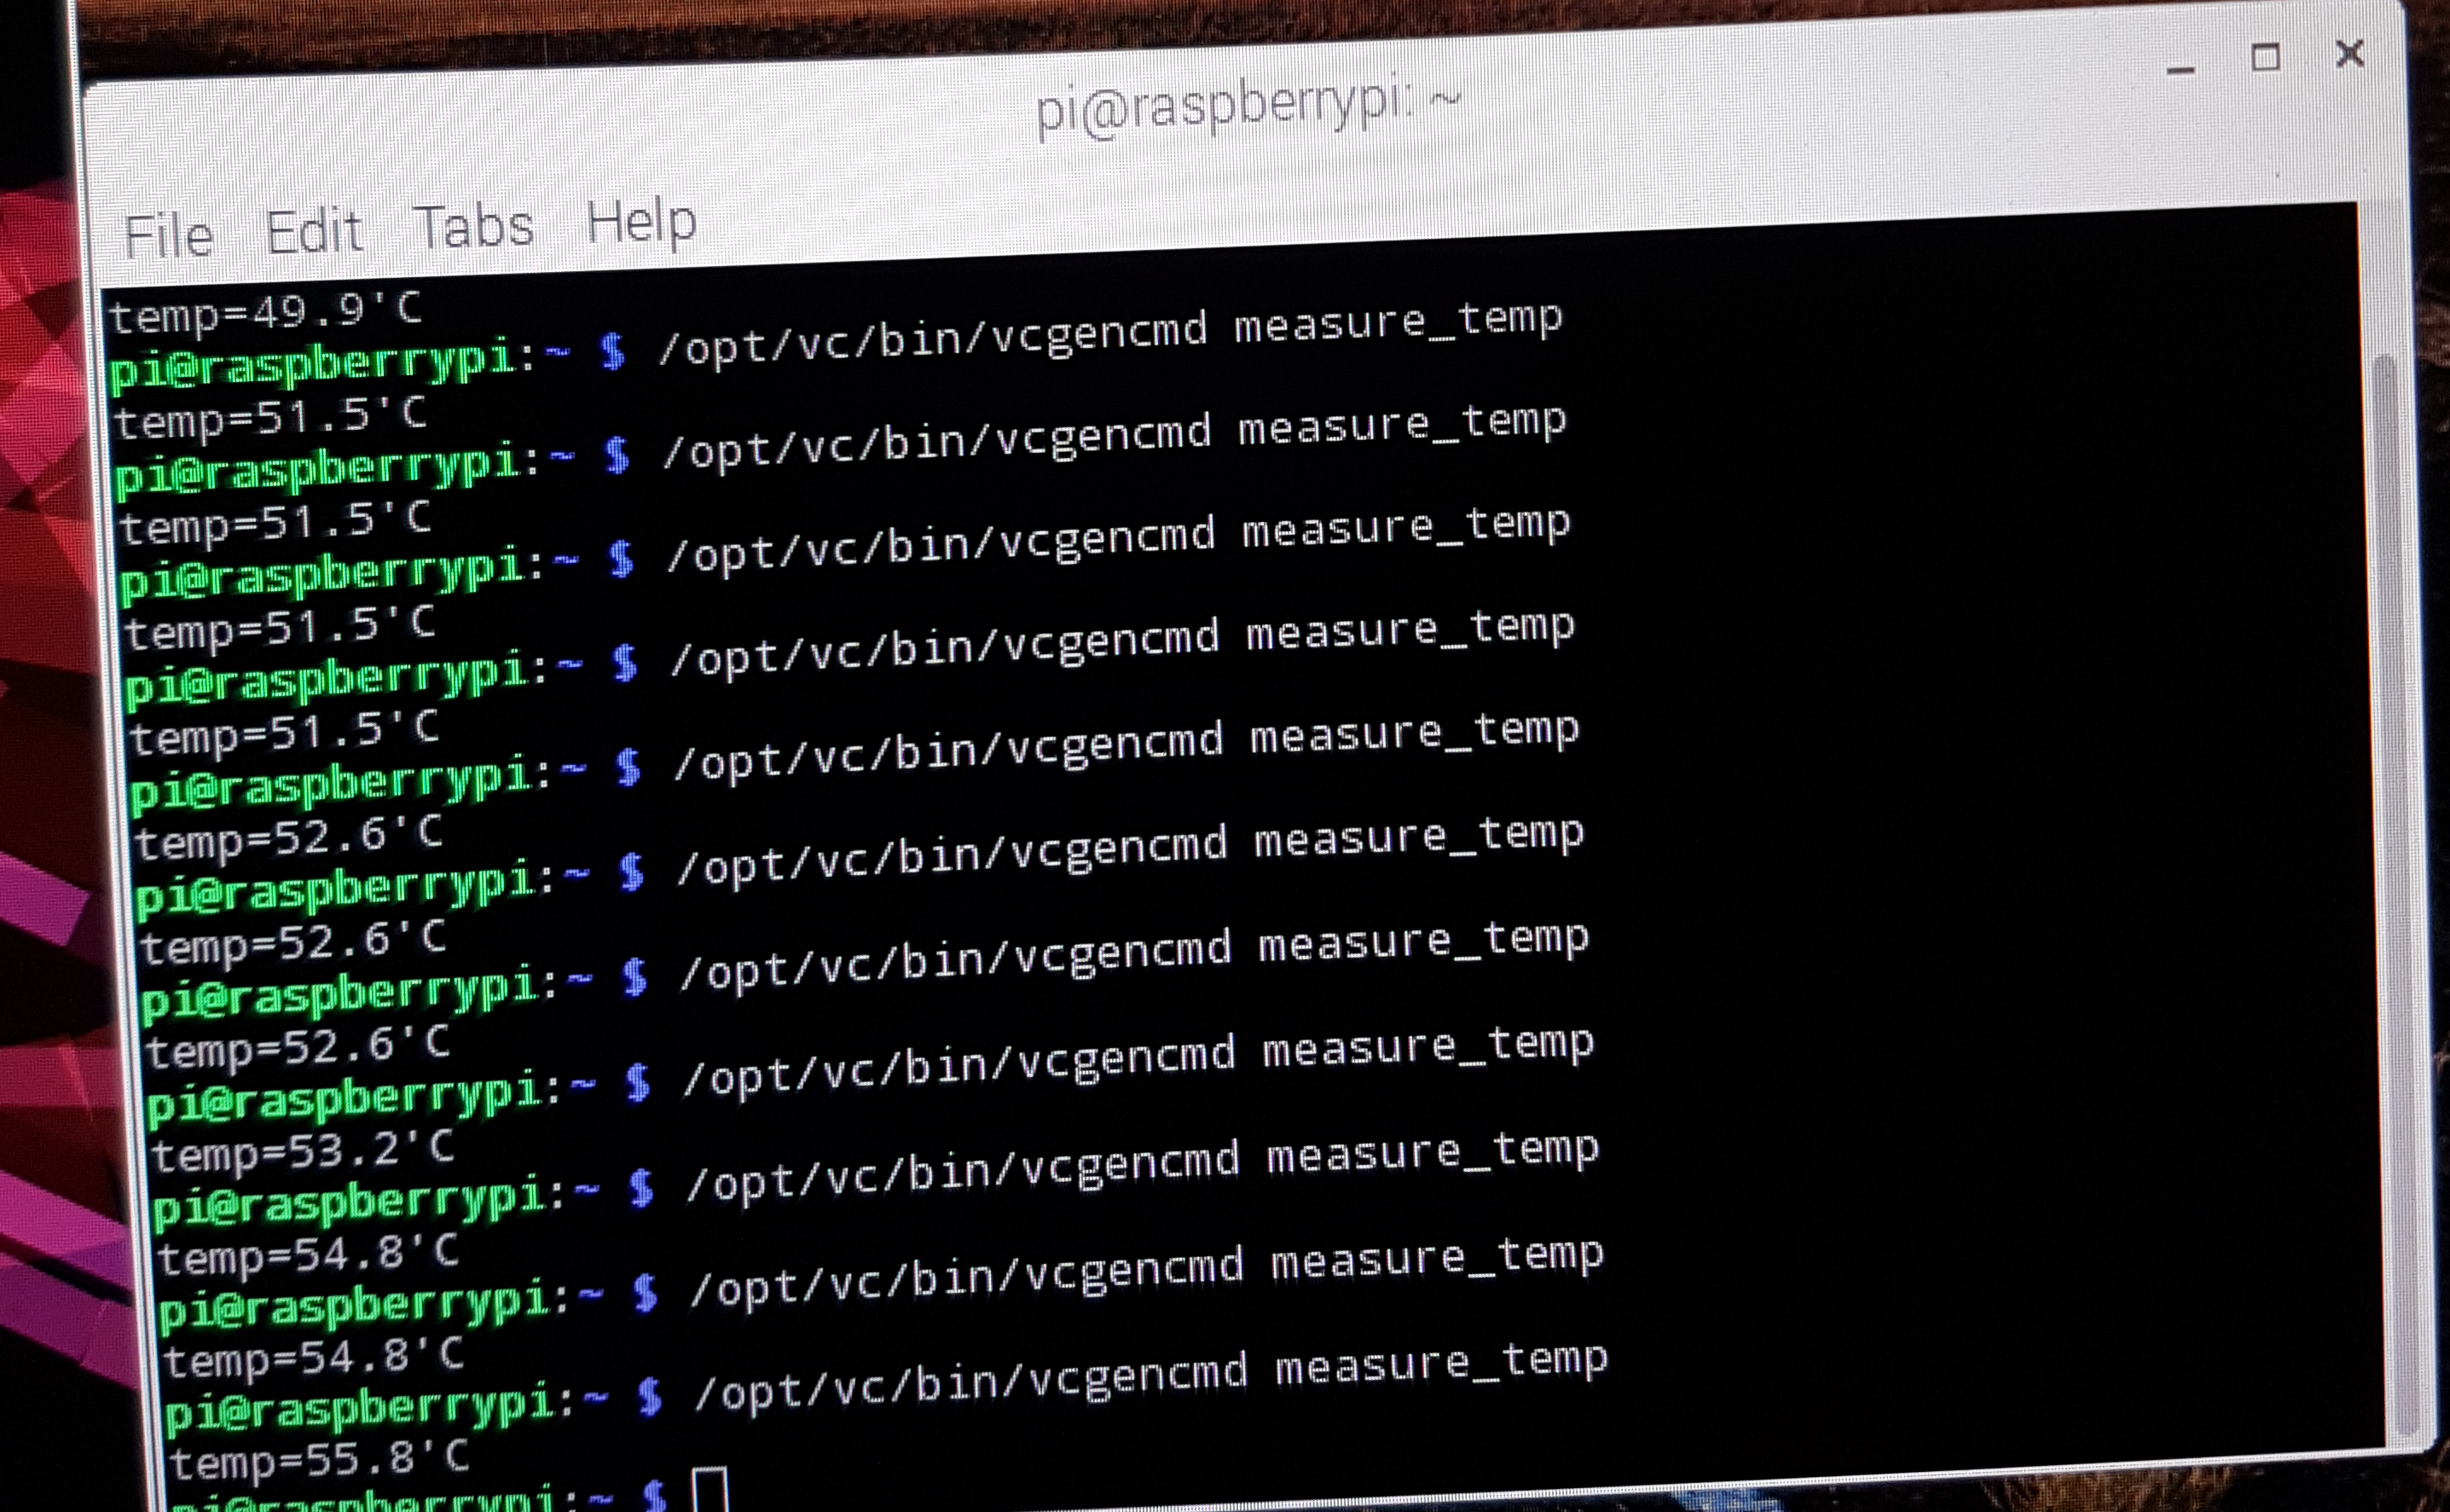
Keep an eye out on the temp, let it run for a while and make sure all is safe
Let’s do some maths
Since the JavaScript demo is a “per-pixel demo”, meaning that it uses the canvas to draw stuff, with a secondary callback cycle applying an alpha clear to give the impression of fading pixels out ( fillrect(0,0,width,height, rgba(0,0,0,0.3)) ) running out of sync — the demo is actually processing millions of bytes per frame.
Just for sake of argument, lets say the chrome window is “1024 x 1024” in 32 bit mode (which is an understatement, but let’s go with that). We then get:
- 1024 * 4 (four bytes per 32 bit pixel) = 4096 bytes per scanline
- 4096 * 1024 = 4,194304 million bytes per frame
There is also a stride offset, but I will ignore that since it probably amounts to about 1kb or less. Right, since we are now drawing 9 frames instead of 2, this gives us:
7 * 4194304 = 29360128 – a boost of 29.3 million bytes per second
Final words
Im sure you can overclock the shit out of this if you really want, but honestly — I would rather have a piece of kit I can trust, that is stable, that dont renders the device useless in six months time – and that gives me that little extra I need for my embedded work (or Amiga emulation for that matter).
Well, that’s it for now — Remember to practise safe hex!
Build NodeJS from Source

nodeJS rocks!
Since your Smart Mobile Studio programs can run from Linux under Raspberry PI, I figured I could write a few words about building from C/C++ source. Normally you don’t need to do this, but in case the process-manager (which makes sure your Smart NodeJS servers can be clustered and essentially controlled as services) can be picky about the version – you may suddenly find yourself needing the cutting edge.
Open up a command-line prompt and CD (change dir) to the location you want to keep node. Since this is so essential to my system I keep it at root (/), but you may want to stuff it in your home folder.
Either way, cd to the location then do:
sudo apt-get install build-essential
sudo apt-get install curl openssl libssl-dev
Odds are this is up to date (it was on my fresh Raspbian image). If not, let it finish (you may need to press “y” at some point) and let it work itself out.
You also need to install git (may also already be there):
sudo apt-get install git
With those in place, let’s do a clone of the node.js repository:
git clone https://github.com/nodejs/node.git
When its finished you should have a “nodejs” folder available. So we cd into that and do a configure:
cd node
./configure
make
sudo make install
Now building anything on the Raspberry PI is slow. So the “make” call will probably take 1.5 hours depending on your PI. If its overclocked you will probably get away with 45 minutes, but a bog standard Raspberry PI 3 is much slower.
When it’s all done, test it with
node --version
As of writing that prints out “8.0.0-pre” since im using the cutting edge pre-release version right now.
Now you can install npm (node package manager) and them pm2 and enjoy the show 🙂
Overclocking the Raspberry PI 3
On the menu for today was a meeting with my partner in crime, Glenn, who is working hard on the Raspberry PI Linux distro for Smart Mobile Studio – and then do some Linux stuff. For the Smart Pascal headers to actually fit the latest stuff I needed (doh) the latest version of Node to test on. Which has to be built from C/C++ source code on the Arm device.
Building purely from C/C++ source on a PI is .. probably the worst thing I did all day. Cross-compile from your PC instead
So I baked a fresh copy of Raspbian with the sexy new Pixel UI, updated packages and so on. I set the CPU in performance mode (yes the CPU has different modes) before doing a compile — installed git, cloned out the latest nodejs repository and hit configure + make.
Well, its been 60+ minutes since the bloody build started so I thought, hey why not overclock the sucker and at least shave some off the waiting. But sadly overclocking is not supported by the official Raspbian system settings.
After a bit of google time I found a guy that had gone through the ropes and settled on a sexy 1400 frequency overclock with an over-voltage at around 6. This is stable and the core temp when spawning 4 intense 100% threads (one for each core) is around 58-60 degrees. In other words, well within the specifications (the cpu blows at around 80 degrees and will also kick the bucket at -40).

The dark side of the force is a pathway to many abilities, some considered unnatural
So — you do this at your own risk. Do not attempt this unless you understand the risk. By overclocking you can kiss the warranty good-bye, and I take NO RESPONSEBILITY for whatever damage or loss this could cause. You are on your own when you overclock anything, be it your dishwasher, PC or Raspberry PI embedded boards.
Having said that, the worst that can happen is that you kill your PI. Not exactly a heart breaking loss since they retail at around $35. In most cases when a CPU gets to warm it just shuts down or programs crash. So should that happen let it cool, then use a normal image and leave overclocking alone.
Heat sinks
Yes it may look silly, but if you overclock anything you need to delegate the extra heat somewhere. You can get a heat-sink set for around $1-$3 depending on the vendor. I ordered a couple of sets from Asia at around $2. You get the same kit at RC components for roughly the same price.

Tiny little things with double-sided sticky tape. Works like a charm.
Ironically it’s not just the CPU that overheat, but also the USB controller and WIFI chip. Thats why a trim-set typically ships with 3 mini heat sinks.
Let there be light!
Boot your PI with a normal raspberry image (and take a backup in case of karma). When you get to the desktop, open a command-prompt and cd all the way back to root (/). Then cd into the boot folder. Inside the boot folder you will find a file called “config.txt”. You need to edit this file with admin rights:
sudo nano config.txt
This opens up nano, a dos like text editor. Just scroll down until you find:
#uncomment to overclock the arm. 700 MHz is the default.
#arm_freq=800
Change that to the following:
#uncomment to overclock the arm. 700 MHz is the default.
arm_freq=1400
over_voltage=6
hit CTRL+x, when asked if you want to save – hit “y”. The file is now saved and the next time you boot – it should run at 1.45 GHz. Which is quite nice
To reboot, just type
reboot
This is the setting that works best for me:
#uncomment to overclock the arm. 700 MHz is the default.
arm_freq=1350
over_voltage=5
sdram_freq=500
gpu_freq=500
The sdram overclocking might not work at all (did for me though), and some PI’s actually wont run any faster above arm_freq=1300, but mine works fine with the above settings.

Click for video!!! From 3 FPS to 7 FPS! We are talking millions of pixels per frame, and going from 3 to 7 FPS is quite a boost!
Also note that if it wont boot, just plug the sd-card into your PC and edit the config.txt there in notepad (the boot folder on the pi is actually a mapping to the windows fat32 partition).
Remember to fit the heat-sinks BEFORE you boot (!)
Updated
Since some guy has posted “you dont understand the raspberry PI” in the comment section I just want to respond to that briefly.
Yes, you are partly right, there are aspects of the PI I dont have a clue about. Nor do I pretend to be guru about every piece of tech i come into contact with (that would be a very booring life IMHO). In fact, what I think is exciting about that little machine is that you can tinker and learn as you go – and that even mid-level users like myself can get results.
The JavaScript demo I used to test the clocking is actually a reasonable starting point. At first it was running at roughly 1 fps (due to poor coding, I used timers rather than RequestAnimationFrame to synchronize redraw). By just changing the arm_freq to 1350 this doubled, to a whopping 2 fps.
After i tweaked the memory clock-speed and gpu and set some overvoltage, that in turn went up to a stable 7 fps.
Since this is a per-pixel demo, meaning that it uses the canvas to draw stuff, with a secondary callback cycle applying an alpha clear to give the impression of fading pixels out ( fillrect(0,0,width,height, rgba(0,0,0,0.3)) ) running out of sync — the demo is actually processing millions of bytes per frame.
Just for sake of argument, lets say the chrome window is “1024 x 1024” in 32 bit mode (which is probably a bit small, but lets go with that). We then get:
- 1024 * 4 (four bytes per 32 bit pixel) = 4096 bytes per scanline
- 4096 * 1024 = 4,194304 million bytes per frame
There is also a stride offset, but I will ignore that since it probably amounts to about 1kb or less. Right, since we are now drawing 7 frames instead of 3, this gives us:
4 * 4194304 = 16,777216 – a boost of 16.7 million bytes per second

I may not be a Raspberry PI guru, nor would I pretend to be one, but boosting the javascript virtual machine by that magnitude is pretty good. And remember: JavaScript is single threaded. I have yet to see what happens when we use all the cores here.
But I am open for information and would love to hear your take on this. Im sure we can dig down and find out exactly which of my settings had the most impact.
Either way: overclocking and tuning the Raspberry PI 3 for better performance is possible. And that was the only thing on the table here.
Geek, Wish and Banggood – Scam alert!

Got ripped off? Where is a GIF of wonderwoman to make you feel better
When shopping electronics in our day and age, with our global economy, it’s super important that you can actually trust the companies involved. No matter if they reside in the US, Norway, France or in the far east – trust is a bond that is the basis of commerce.
One of the most read articles on this blog, and that should say something considering I have been blogging on a weekly basis for years now – is my post about the Assassins Creed hoodie scam. If you read the comments you will notice how many have fallen for this scam and that they keep changing name whenever they get too much heat. Thankfully my blog has pretty good coverage, so I have helped save a lot of people out of getting ripped off — which I consider my duty regardless of where you live.
I therefore feel its my duty to warn you about these online vendors as well, namely: Geek, Wish and Banggood. Because having used their services for the past year, they represent probably the worst experiences I have ever had when ordering goods abroad.
Geek and Wish
These two are actually one and the same. It doesn’t matter if you download the Wish app or the Geek app — it’s the same asian online mall, and where you get the impression that you are ordering from a single store (or at least someone who ensures a reasonable degree of responsibility), its actually hundreds of individual stores all cooked together into a single, massive catalog.
In short, asian retailers can register and get their goods included in the single webshop, but they can reside in completely different regions (even nations).
And the rating system that is supposed to protect you is a complete scam as well. I spent the better part of an afternoon looking up electronics, and I found the same comments with different names on completely different products. In some cases they havent even bothered to clean up the text, but had a review for bath-robes on super-nintendo compatible handheld consoles, bicycle lights on green laser products (and so on). So you essentially had a few hundred comments that were utterly fake, rotated and adapted to different products. Some comments were real ofcourse, but you dont exactly trust a store that you know includes fake feedback comments and ratings.
Sadly I noticed this after I had aleady ordered and paid.
As for getting what you actually ordered, well – I am still waiting for my two touch screens to use with my Raspberry PI. It’s now been almost two months since I first ordered, and my email’s to the shop is not even replied to. And the tracking ID for the packages I got in my order-confirmation email are invalid (I tried to use them and they dont work) — so this was me throwing money out the window.
When it comes to what you order and what you get, that is rarely the case. I ordered 2 handheld consoles which was advertised as being SNES and Mame compatible. Quad Core CPU, 1 gigabyte of ram and support for normal TF cards. What I got was a useless handheld that just barely supported Gameboy roms – and it struggled to even start them (!) The menu system was sluggish. So sluggish it was almost impossible to navigate the games that were built into the device. When trying to return this and launch a complaint, the store-salesman replied in chinese to everything. On purpuse, because when I first contacted them they replied in english. It was only when I brought up the complaint that they switched to chinese to brush me off. Basically he just did not care that what I received was not what I ordered. And he made no effort to clean up his mess. In other words: a scam.
When I contacted wish, that has a european contact number – rather than being helpful they just argued against what I had to say. It is by far the worst experience I have ever had with regards to online ordering.
Banggod
This is another, similar concept as wish and geek. The sneaky part is that they have translated webpages that gives the impression that you are ordering from a local branch -or at least within the EU. But on closer examination it is yet another asian mall front. Stores can register and there is no system in place to kick stores out based on feedback – or give them negative feedback that actually sticks.
Here I paid with my credit card, yet they managed to send me a bill via a Norwegian invoice company. And just like wish and geek – they have no interest in your case, they just want to get rid of you.
Stay away
I don’t base my warning on a single case. In all cases I have ordered multiple products, and I have also given each system a second chance. In which they all failed and was useless to me as a customer. As for customer service they exclusively took the store’s side (which is absurd when you have ordered a quad-core cpu based product, and you get something running of a cpu that couldn’t even control a dish-washer).
So you should stay away from these, because you will be ripped off one way or another.
Use AliExpress instead
The only asian store-front I have good experiences with is AliExpress. They have a real comment system in place, and they also have a working feedback system. If a store get’s to many negative responses they are actually kicked out. As such the emphasis is on positive feedback and being honest. A negative score is enough to lose hundreds of sales so naturally they work very hard to make sure things work.
When ordering via AliExpress I have never once gotten something else, I have always gotten exactly what I ordered – and there is also a refund system that will refund you should a store try to cheat you. In fact, money is held in escrow until the package has been tracked to your address and is marked as delivered.
You then have 14 days to demand a refund, in which you have to send the package back and give AliExpress the new tracking number. Once the package has been verified as delivered, you get your money back.
For components I suggest RC electronics. I just dont order that much from china any more because (and I am sad to say this) they have to many scams and you cant trust them. But when I order from asia, its via AliExpress. I have yet to have a bad experience there.
Sneak peek at the new Smart RTL – Part 2
If you missed the last sneak peek, click here to catch the first part.
In the previous post we had a look at a handful of the new features of the upcoming RTL. This time we will look at a couple of more. There is quite a few to write about, so I could probably do 10 of these “peek posts” to be honest.
Fine tune control
Support for CreationFlags is something we finally got into the RTL. If you have created your own controls using Delphi or Lazarus you are probably familiar with them? In short, it’s a set of special values that defines how a control should behave. And they are very important.
CreationFlags is defined as a class function, so this is a method you override when defining your own controls. It looks like this:
class function TW3TagObj.CreationFlags:TW3CreationFlags;
begin
  result := [
    cfAllowSelection,
    cfSupportAdjustment,
    cfReportChildAddition,
    cfReportChildRemoval,
    cfReportMovement,
    cfReportReSize
    ];
end;
The flags themselves are defined as such:
  TW3CreationFlags = set of
    (
    cfIgnoreReadyState,     // Ignore waiting for readystate
    cfSupportAdjustment,    // Controls requires boxing adjustment (default!)
    cfReportChildAddition,  // Dont call ChildAdded() on element insertion
    cfReportChildRemoval,   // Dont call ChildRemoved() on element removal
    cfReportMovement,       // Report movements? Managed call to Moved()
    cfReportResize,         // Report resize? Manages call to Resize()
    cfAllowSelection,       // Allow for text selection
    cfKeyCapture            // assign tabindex, causing the control to issue key and focus events
    );
So what is the big deal? Well, lets say you want keyboard support for a control (and under Smart Pascal you are expected to write your own controls all the time, it’s a part of how you work with the RTL. Just like C# expects you to inherit and implement your own classes) — now previously you could only capture input from traditional input controls. Like a Textbox or Memo. Which is quite limiting to say the least.
Now however, all you have to do to get keyboard support is to add cfKeyCapture and the OnKeyPress (and associated events) will fire, no matter if the control is based on a DIV (standard) or some other HTML element.

The Windows 10 category header is fully animated. It can also be navigated using the arrow keys.
As you can see from the list of flags you can now disable some of the inner mechanics for a control if you don’t need it. Things like automatic calls to Resize() whenever the width or height is changed, the call to Moved() whenever a control is (drumroll) moved can also be disabled.
If you are wondering why this should be good news then consider this: Imagine you are implementing a really cool DB grid in Smart Pascal. One that needs to display 10.000 records just as fast as 100 records. When dealing with presentation of this amount of items, every call your code makes count (!) In fact, fast and responsive grids has been something of a holy grail for JavaScript over the years. Its only in the past 3 years we are starting to see high quality grids that is en-par with their native counterparts (like Developer Express, TMS and others).
Just like in Delphi or C# there are functions that the average developer don’t really care about or have to know to use the product – so its is with Smart. There will be functions that makes little sense to the average developer, but who are super important to people who make and sell components.
Ready, set, Action!
The core unit for visual controls in the RTL, SmartCL.Components.pas, have a number of additions, but the most important one is without a doubt the support for Actions. A feature of Delphi that has distinguished it from other RAD tools for decades (C# only recently got support for this, believe it or not).
But Actions is not so simple as you may think. It’s not just a matter of adding an Action property to our control-base. Actions also have to be reflected in the IDE, and it brings with it another feature that has been on our wish-list for a while now: namely non-visible controls!
  TW3TagObj = class(TW3CustomWidget, IW3ActionSubscriber)
  private
    FOwner:     TControlHandle;
    FHandle:    TControlHandle;
    FTagId:     string;
    FUpdating:  integer;
    FAttributes: TW3ElementAttributes;
    FComponentState:  TComponentState;

    {$IFDEF USE_ACTIONS}
    FAction:  TW3Action;
    function GetActionObject: TW3Action;
    procedure SetActionObject(const ActionObj: TW3Action);

    (* Implements:: IW3ActionSubscriber interface *)
    procedure RegisterAction(const Action: TW3Action);
    procedure UnRegisterAction(const Action: TW3Action);
    procedure ActionStateChanged(const Action: TW3Action);
    {$ENDIF}
Notice how TW3TagObj suddenly have a new ancestor? It used to inherit directly from TObject, but now suddenly it inherits from TW3CustomWidget (name is not yet carved in stone, we may call it something else since “widget” is often used for visual elements under QT C++). So indeed — non visual, drag & drop components is finally in the making.
But rather than cluttering up your forms we will go for a visual-studio like drop-zone at the bottom of your forms. This does a world of good for the size of your binaries. First of all, had we moved non-visual controls up to TComponent like Delphi and Lazarus do, it would mean a lot of useless code would be involved. TW3Component is designed to deal with child elements, child elements that have handles or map to the document object model. To avoid bloat we have introduced non-visual code earlier in the inheritance chain. Most non visual controls dont create or map to handles, nor do they create visual elements at all, so why have all that extra code attached to it?
GPU power
As you probably know, modern browser engines like Webkit are GPU powered. This means that a DIV or PRE tag (which our controls create when you call the constructor) can be marked for hardware acceleration. This was earlier a manual thing, something you would add to the stylesheet of your application.
Well, you can now call the method TW3TagObj.SetInitialTransformationStyles() in your constructor, and the control is marked for GPU rendering. Just remember: to much of a good thing is not cool. So think about what you accelerate. You would for example, not call this function on a DB grid, but rather on the rows being displayed.
Controllers
This is a new concept for Smart. A controller is a class that allows you to add extra features to a component indirectly (by proxy. Even existing controls). A controller is typically small and aims at delivering specialized features. Stuff that would be overkill to place in a TW3Widget (non visual control), yet to large for a utility unit. Since its all about control over something, we just let it name itself.
The base-class for a controller is very lightweight:
  TW3Controller = class(TW3OwnedObject, IW3Controller, IW3ControllerEventAccess)
  private
    (* IW3Controller Implementation *)
    function GetAttachedEventHandler:TW3ControllerAttachedEvent;
    procedure SetAttachedEventHandler(const EventHandler: TW3ControllerAttachedEvent);
    function GetDetachedEventHandler:TW3ControllerDetachedEvent;
    procedure SetDetachedEventHandler(const EventHandler: TW3ControllerDetachedEvent);
  protected
    function  QueryAttachment:Boolean;virtual;abstract;
    procedure DoAttach;virtual;
    procedure DoDetach;virtual;

    property OnAttached:TW3ControllerAttachedEvent;
    property OnDetached:TW3ControllerDetachedEvent;
  public
    Property  AutoDetach:Boolean;
    property  Attached:Boolean read QueryAttachment;
    procedure Attach(const AOwner: TObject);virtual;
    procedure Detach;virtual;

    constructor Create(AOwner: TObject);override;
    destructor Destroy;Override;
  end;
As of writing we have these controllers implemented:
- Edge Sense
- Swipe
- Attributes
- PlainScroll
- MomentumScroll
- iScroll
Edge-sense adds code to sensing when the mousepointer is within range of a controls edge. This controller is what you would use to deal with live resizing. It’s actually used in our new DB grid to deal with resize of column headers. As a controller it can be created on the fly and just attached to any custom control. It targets the handle and works with it from the JavaScript side of things, so it doesn’t interfere or override any code in the control it targets.
Our swipe-controller is a simple way to deal with horizontal or vertical swipes. The most common gestures on mobile devices. So if you are displaying information that can be swiped – like pages in a book, or scrolling in a new item — then this is a quick and easy solution. The alternative is to deal with gestures through events. But if all you need is swipe left/right or top/bottom (or both) – this controller is the ticket.
The scroll controllers are very cool. Let’s say you have a normal listbox right. Well, now you can chose what type of scrolling that listbox should use. If you want vanilla scrolling without any momentum, then you just attach a TW3PlainScrollController and it will scroll without any bouncing or acceleration. If you want acceleration, you create a TW3MomentumScrollController and attach that. Then it will scroll like an “iPhone list” (more or less). We have also wrapped iScroll, which is a JS library that emulates iPhone scrolling down to the letter (and then some).
Attributes allows you to store information in a tag. When you create a visual control, the RTL creates a tag via JavaScript. Traditionally these tags can only contain attributes they support. A while back this was extended so you can now add as many attributes as you like to a tag, providing it starts with “db-“. What is the use for this you ponder? Well let’s say you need some way of marking a control as active, or being processed. Rather than having to keep track of that state in a dictionary or array — you can now just mark the html tag directly.
We use this in our SmartCL.effects.pas unit. When you apply an effect to a control, the control is marked as “busy” while the effect is running. That way you don’t accidentally execute more than one effect on the same control (which would have unpredictable results). Instead the framework will cache up the effects you have applied, and execute them in sequence. And all of it is very efficient since the info is stored in the tag itself rather than in a JavaScript array of dictionary.
Mousewheel support
Indeed another tiny but very important feature! This has been added to TW3Scrollbar and thus all our scrolling controls now support this out of the box.
Any new components?
Oh yes, there is plenty of new components and quite a few JavaScript libraries for you to enjoy. Pretty much all of the QTX components have been given an overhaul and is now a part of the standard library. This includes:
- TW3SimpleLabel
- TW3EdgeNavigation
- TW3CategoryHeader
- TW3DBGrid
- TW3DesignSurface
- .. and much more (!)

Need a design surface? Perhaps you need to display a document, or create a real form designer? Well inherit from this and style it to your wishes
Some of the more awesome libraries we have ported over are:
- Pixi.js
- plumb.js
- require.js
- socket.io
- stacktrace.js
- brain.js (neural network)
- Ace code editor (*)
Wait a minute, ACE? What is that?
Ace is the #1 Javascript code editor, implemented in JavaScript (naturally). Basically it does the exact same thing that SynEdit or TBoneCode editor does for Delphi. Except that it does more than SynEdit, have better support for different languages and dialects, syntax highlighting, code proposal, code folding — all of it! And now it’s a control you can drop on a form.
Just to demonstrate what you can do with Smart Mobile Studio, we created a real compiler. A compiler that takes the legendary Amos Basic language of the 90’s, and generates assembly bytecodes for a virtual machine. All of it written in Smart Mobile Studio. Fancy a bit of retro game coding? Well at least the editor wont hold you back!

Amos Basic for the Amiga, recreated in HTML5. And it generates bytecodes as well! Programs can be executed both in the browser and for node.js
Pixie? Eh.. fairy dust much?
You can say that. Actually its the #1 multimedia content engine for JavaScript. It uses WebGL to render 2D graphics at incredible speed and with features normally found only in high-end game engines. Want to impress someone with your Smart skills? Whip out Pixie and knock ’em dead with effects they wont even believe is coming out of JavaScript!

You really should see this live, so pay them a visit and get blown away by the power you can now control from pascal!
Is there more?
Hell yeah, I have just scratched the surface! But my fingers hurt now so I’ll take a break and post more inside information in the days and weeks to come.
Stay tuned!
Sneak peek at the new Smart RTL
There are many new and powerful features in the upcoming release of Smart Mobile Studio. And one of the smallest, yet most powerful and useful features – is the ability to be notified when a value or property of an object is altered.
So far, TVariant has just been a helper class for dealing with typical tasks. Well, perhaps not just typical because under Smart Pascal, variants can map directly to a javascript object (of any type) and allows you direct access to its prototype.
In the next update TVariant has a few new members, most notably: watch() and unwatch().
As their name imply they allow you to be notified whenever a single property, or indeed – a property representing a child object, is altered. It may sound trivial but it’s actually one of those features that lays the foundation for responsive, data-aware controls. But you can use it for many other things as well, like keeping tab’s on async calls that alters some value. Wouldnt it be cool to be notified when a picture has finished loading? Well, TW3Image has events for that, but being able to achieve the same results with different means is cool. Well, now you can!
Here is how you can use it:
  // create an empty javascript object
  var MyValue: Variant;
  MyValue := TVariant.CreateObject();
  MyValue.NewProperty := 12; // add a property and set a value

  // We want to know when the object changes
  TVariant.Watch(MyValue, "NewProperty", procedure ()
    begin
      showmessage("You changed the value!");
    end);

  // Wait 2 seconds and then change the value
  TW3Dispatch.Execute( procedure ()
    begin
      MyValue.NewProperty := 24;
    end, 2000);
The above code produces, as expected, a message dialog with the text “You changed the value!” 2 seconds after. So the moment “MyValue.NewProperty := 24” is called, the underlying mechanism picks that up and informs you of it through an anonymous call. Removing a watch is equally simple:
  // Remove the watchdog callback from the javascript prototype
  TVariant.UnWatch(MyValue, "Newproperty");
As of writing only Firefox supports this natively: but dont worry! We use the now universal and standard polyfill written by Eli Grey. So this polyfill is compiled into your application regardless. Its essentially now a standard part of the RTL. We have tested it on iOS, Android, Chrome, Internet Explorer, Spartan and even node.js and it performs brilliantly with little or no penalty with regards to speed. The polyfill simply injects itself as a new getter/setter and keeps track of the old, that’s how it can intercept values without causing problems with the intrinsic mechanisms in the JSVM. For those interested, here is the polyfill:
/*
 * object.watch polyfill
 *
 * 2012-04-03
 *
 * By Eli Grey, http://eligrey.com
 * Public Domain.
 * NO WARRANTY EXPRESSED OR IMPLIED. USE AT YOUR OWN RISK.
 */

// object.watch
if (!Object.prototype.watch) {
	Object.defineProperty(Object.prototype, "watch", {
		  enumerable: false
		, configurable: true
		, writable: false
		, value: function (prop, handler) {
			var
			  oldval = this[prop]
			, newval = oldval
			, getter = function () {
				return newval;
			}
			, setter = function (val) {
				oldval = newval;
				return newval = handler.call(this, prop, oldval, val);
			}
			;

			if (delete this[prop]) { // can't watch constants
				Object.defineProperty(this, prop, {
					  get: getter
					, set: setter
					, enumerable: true
					, configurable: true
				});
			}
		}
	});
}

// object.unwatch
if (!Object.prototype.unwatch) {
	Object.defineProperty(Object.prototype, "unwatch", {
		  enumerable: false
		, configurable: true
		, writable: false
		, value: function (prop) {
			var val = this[prop];
			delete this[prop]; // remove accessors
			this[prop] = val;
		}
	});
}
TW3Dispatch
Did you notice that I used TW3Dispatch.Execute() rather than the old w3_callback() function? Indeed. Part of the cleanup we are doing is not just about new and fancy code. Its also about removing duplicate code (which we had a lot of) and to organize as much as possible into classes or namespaces.
TW3Dispatch is a class that deals with delayed execution of code. It is stored in the new System.Time.pas unit and is marked as a partial class. Here is what the basis looks like under System.Time.pas:
  TW3DispatchHandle = THandle;

  (* This class is a thin wrapper around the essential JavaScript callback
     and time-scheduling methods (for delayed or repeated execution of code).
     It is isolated here to protect the user against changes in future revisions
     of javascript, and also different environments that has not yet
     reached the market. This gives us space to adapt to changes without
     affecting your codebase *)
  TW3Dispatch = partial class
    class function Execute(const EntryPoint:TProcedureRef;
          const WaitForInMs: integer): TW3DispatchHandle;overload;

    class procedure CancelExecute(const Handle: TW3DispatchHandle);

    class procedure RepeatExecute(const Entrypoint: TProcedureRef;
            const RepeatCount: integer;
            const IntervalInMs: integer);

    class function SetTimeOut(const Entrypoint: TProcedureRef;
      const WaitForInMs: integer): TW3DispatchHandle;

    class procedure ClearTimeOut(const Handle: TW3DispatchHandle);

    class function SetInterval(const Entrypoint: TProcedureRef;
      const IntervalDelayInMS: integer): TW3DispatchHandle;

    class procedure ClearInterval(const Handle: TW3DispatchHandle);

    class function JsNow: JDate;

    class function Ticks: integer;
    class function TicksOf(const Present: TDateTime): integer;
    class function TicksBetween(const Past, Future: TDateTime): integer;
  end;
The reason the class is marked as partial, is because depending on the framework you are using (SmartNJ for node.js, or SmartCL for visual applications), TW3Dispatch is expanded accordingly. If we move over to the SmartCL RTL folder and look at the file SmartCL.System.pas (yes, the same units exist in the different namespaces), TW3Dispatch gains the following, DOM related functionality:
  (* TW3Dispatch is defined in the System.Time unit.
     We complete the partial class here with DOM spesific functionality *)
  TW3Dispatch = partial class
  public
    class function Ready:Boolean;
    class procedure ExecuteDocumentReady(const OnReady:TProcedureRef);
    class function RequestAnimationFrame(const Entrypoint: TProcedureRef): TW3DispatchHandle;virtual;
    class procedure CancelRequestAnimationFrame(const Reference: TW3DispatchHandle);virtual;
  end;
The Ready() function is a handy one, it tells you if the browser has finished loading associated scripts and resources and that the document object model is, well, ready to be used. But while that is handy (especially in Form.Initialization() and similar spots that can be called while the DOM is not yet finished), ExecuteDocumentReady() makes it almost fun to write controls and get the startup of your application synchronized.
As you probably know JavaScript is ASYNC by nature. This means that any attempt to force it to behave like traditional object pascal is a gamble at best. Earlier you had to make due with a timer callback to give you some delay before performing a graphics, but now you can use ExecuteDocumentReady() to make sure everything is in order before you execute that special piece of code. It takes a single anonymous procedure, like this:
  TW3Dispatch.ExecuteDocumentReady( procedure ()
    begin
      showmessage("Its now safe to modify the DOM!");
    end);
Now the amount of changes and alterations to the RTL is in the hundreds, so explaining them all here is beyond the scope of this post. But here are a few more classes that makes your life easier:
  TW3MouseCursor = static class
  public
    class function  CursorByName(const CursorName: string): TCursor;
    class function  NameByCursor(const Cursor: TCursor): String;
    class function  GetCursorFromElement(const Handle: TControlHandle): TCursor;
    class procedure SetCursorForElement
      (const Handle: TControlHandle; const Cursor: TCursor);
  end;

  TW3DOMDeviceCapabilities = class(TW3CustomDeviceCapabilities)
  protected
    function GetMouseSupport: boolean;override;
    function GetTouchSupport: boolean;override;
    function GetGamePadSupport: boolean;override;
    function GetKeyboardSupported: boolean;override;
    function GetDevicePixelRatio: float;virtual;
    function GetDisplayPixelsPerInch: TPixelsPerInch;virtual;
  public
    property  DevicePixelRatio: float read GetDevicePixelRatio;
    property  DisplayPixelsPerInch: TPixelsPerInch read GetDisplayPixelsPerInch;
  end;

  TW3TweenEngine = class
  private
    FTimer:    TW3Timer;
    FValues:   Array of TW3TweenElement;
    FActive:   boolean;
    FPartial:  boolean;
    FInterval: integer;
    FLookup:   TW3ObjDictionary;
    procedure  SetInterval(const Value: integer);
  protected
    procedure HandleSyncUpdate;virtual;
    procedure HandleUpdateTimer(Sender: TObject);virtual;
    function  Update(const Item: TW3TweenElement):double;virtual;
  protected
    property  Dictionary:TW3ObjDictionary read FLookup;
    procedure TweenStarted(const Item:TW3TweenElement);virtual;
    procedure TweenComplete(const Item:TW3TweenElement);virtual;
    procedure TweenPaused(const Item:TW3TweenElement);virtual;
    procedure TweenResumed(const Item:TW3TweenElement);virtual;
  public
    function  ObjectOf(const Id: string):TW3TweenElement;
    function  IndexOf(Id: string): integer;

    property  Active: boolean read ( FActive );
    property  Item[const index: integer]:TW3TweenElement read (FValues[index]);
    property  Tween[const Id: string]:TW3TweenElement read ObjectOf;default;
    property  Count:Integer read ( FValues.Length );
    property  Interval: integer read FInterval write SetInterval;

    property  SyncRefresh: boolean;
    property  IgnoreOscillate: boolean;

    function  Add(Id: string): TW3TweenElement;overload;
    function  Add(Id: string; const StartValue, Distance,Duration: double;
              const EaseObject: TW3TweenEase;
              const Behavior: TW3TweenBehavior): TW3TweenElement;overload;
    function  Add(const Instance: TW3TweenElement): TW3TweenElement;overload;

    procedure Delete(index: integer);overload;
    procedure Delete(Id: string);overload;
    procedure Delete(const IdList: TStrArray);overload;

    procedure Clear;overload;

    procedure Execute;overload;
    procedure Execute(const Finished: TProcedureRef);overload;
    procedure Execute(const TweenObjects: Array of TW3TweenElement);overload;

    procedure Pause(const Index: integer);overload;
    procedure Pause(const Tween: TW3TweenElement);overload;
    procedure Pause(const Objs: array of TW3TweenElement);overload;
    procedure Pause(const Ids: array of string);overload;
    procedure Pause;overload;

    procedure Resume(const index: integer);overload;
    procedure Resume(const Tween: TW3TweenElement);overload;
    procedure Resume(const Objs: array of TW3TweenElement);overload;
    procedure Resume(const Ids: array of String);overload;
    procedure Resume;overload;

    procedure Cancel;overload;

    class function TimeCode: double;

    constructor Create;virtual;
    destructor Destroy;Override;
  published
    property OnPartial:  TW3TweenPartialEvent;
    property OnUpdated:  TW3TweenUpdatedEvent;
    property OnFinished: TW3TweenFinishedEvent;
    property OnStarted:  TW3TweenStartedEvent;
  end;

  TMutationObserver = Class(TObject)
  public
    FObserving:   Boolean;
    FHandle:      THandle;
    FTarget:      THandle;
  protected
    procedure     CBMutationChange(mutationRecordsList:variant);virtual;
  public
    Property      OnDisconnect:TNotifyEvent;
    Property      OnConnect:TNotifyEvent;
    property      OnChanged:TMutationObserverEvent;
    Property      Handle:THandle read FHandle;
    Property      TargetHandle:THandle read FTarget;
    Property      Options:TMutationObserverOptions;
    Property      Observing:Boolean read FObserving;
    Procedure     Observe(targetHandle:THandle);
    Procedure     Disconnect;
    Constructor   Create;virtual;
    Destructor    Destroy;Override;
  end;

  TW3StyleSheet = Class(TObject)
  private
    FHandle:    THandle;
  protected
    function    GetSheet: THandle;
    function    GetRules: THandle;
    function    GetCount: integer;
    function    GetItem(const Index: integer): string;
  public
    Property    Sheet: THandle read GetSheet;
    Property    Handle: THandle read FHandle;

    function    Add(RuleName: string; const aRules: string): string;overload;
    Procedure   Add(const aRuleText: string);overload;

    Property    Count:Integer read GetCount;
    Property    Items[const Index: integer]: string read GetItem;

    class procedure AddClassToElement(const aElement:THandle;const aName:String);
    class procedure RemoveClassFromElement(const aElement:THandle;const aName:String);
    class function  FindClassInElement(const aElement:THandle;const aName:String):Boolean;

    Constructor Create;virtual;
    Destructor  Destroy;Override;
  End;


  TW3CustomAsset = class(TW3OwnedObject, IW3AssetAccess)
  private
    FState:       TW3AssetState;
    FCanceled:    boolean;
    FIdentifier:  TW3AssetIdentifier;
  protected
    procedure BeforeAssetIO;virtual;
    procedure AfterAssetIO;virtual;
    procedure FailedAssetIO;virtual;
    procedure ResetData;virtual;
    procedure SetState(const NewState:TW3AssetState);
    procedure SetIdentifier(const NewIdentifier:TW3AssetIdentifier);
    procedure SetData(const Value: variant);
  protected

    function  ManagerAccess: IW3AssetManagerAccess;

    procedure PerformIO(const ThisURI: String;
      OnReady: TW3AssetReadyEvent;
      OnFailed: TW3AssetIOFailureEvent);virtual;

  public
    Property  Owner: TW3AssetManager read ( TW3AssetManager(inherited Owner) );
    Property  URI: String;
    Property  Data: TW3AssetData;
    Property  State: TW3AssetState read FState;
    property  Identifier: TW3AssetIdentifier read FIdentifier;

    procedure Execute;virtual;
    procedure Cancel;virtual;

    constructor Create(const AOwner: TW3AssetManager);reintroduce;
    destructor  Destroy;override;

  published
    Property  OnBeforeIO: TW3AssetBeforeIOEvent;
    property  OnExecuting: TW3AssetIOEvent;
    property  OnAssetReady: TW3AssetReadyEvent;
    property  OnAssetFailed: TW3AssetIOFailureEvent;
  end;

  TW3AssetManager = class(TObject, IW3AssetManagerAccess)
  private
    FAssets:  array of TW3CustomAsset;
    FRemaining: integer;
    FState:     TW3AssetManagerState;
  protected
    procedure   AssetReady(const Asset:TW3CustomAsset);virtual;
    procedure   AssetFailed(const Asset:TW3CustomAsset);virtual;
    function    GetAssetById(const AssetId: TW3AssetIdentifier): TW3CustomAsset;
  public
    property    Active: boolean read ( (FRemaining>0) and (FState=msLoading) );
    property    State: TW3AssetManagerState read FState;
    Property    RemainingToLoad: Integer read FRemaining;
    property    ReadyToUse: integer read (FAssets.Count - FRemaining);
    property    Assets[const Id:string]:TW3CustomAsset read GetAssetById;
    property    Items[const AssetIndex: integer]:TW3CustomAsset read (FAssets[AssetIndex]);
    property    Count: integer read (FAssets.Count);

    function    Add(const AssetObject: TW3CustomAsset): TW3CustomAsset;

    procedure   LoadAllAssets;
    procedure   Cancel;
    procedure   Reset;
    procedure   Clear;

    destructor  Destroy;override;
  end;
Then we have codecs for dealing with ciphers and conversion in a unified way, and much, much more. But you probably want to see the new node.js high level classes right? Well here is little taste
  TW3NodeFileSystem = class(TW3CustomFileSystem)
  public
    function Examine(const FullPath: String;var Files: TStrArray):boolean; override;
    function Rename(const OldPath, NewPath: String): boolean;override;
    function FileExists(const Filename: string): boolean;override;
    function DirectoryExists(const FullPath: string): boolean;override;
    function QueryFilePermissions(const FullPath: string;var Permissions:TW3FilePermissionMask): boolean;override;
    function CreateDirectory(const FullPath: string; Permissions: TW3FilePermissionMask): boolean;override;
    function DeleteDirectory(const FullPath: string): boolean;override;

    function QueryFilesize(const Filename: string;var Size:integer):Boolean;override;
    procedure LoadBinaryFile(const Filename: string; var Binary: TBinaryData);override;
    procedure LoadTextFile(const Filename: string; var Text: string);override;
    procedure LoadStreamFile(const Filename: string; var Stream: TStream);override;
    procedure SaveBinaryFile(const Filename: string; const Binary: TBinaryData);override;
    procedure SaveTextFile(const Filename: string; const Text: string);override;
    procedure SaveStreamFile(const Filename: string; const Stream: TStream);override;

    procedure ExamineA(const FullPath: String; const CallBack: TW3FileSystemExamineHandler);
    procedure RenameA(const OldPath, NewPath: String; const CallBack: TW3FileSystemErrorHandler);
    procedure FileExistsA(const Filename: string; const Callback: TW3FileSystemExistsHandler);
    procedure DirectoryExistsA(const FullPath: string; const Callback: TW3FileSystemExistsHandler);
    procedure CreateDirectoryA(const FullPath: string; Permissions: TW3FilePermissionMask; const CallBack: TW3FileSystemErrorHandler);
    procedure DeleteDirectoryA(const FullPath: string; const CallBack: TW3FileSystemErrorHandler);
  end;

  TNJServerAfterStartedEvent = procedure (sender: TObject);
  TNJServerAfterStoppedEvent = procedure (sender: TObject);
  TNJServerBeforeStartEvent = procedure (sender: TObject);
  TNJServerBeforeStopEvent = procedure (sender: TObject);

  TNJHandleBasedClass = class(TObject)
  private
    FHandle:  THandle;
  protected
    procedure SetHandle(const NewHandle: THandle); virtual;
    function  GetHandle: THandle; virtual;
  public
    property Handle: THandle read GetHandle;
  end;

  TNJServerChildClass = class(TNJHandleBasedClass)
  private
    FParent: TNJCustomServer;
  public
    property Server: TNJCustomServer read FParent;
    constructor Create(Server: TNJCustomServer); virtual;
  end;

  TNJCustomServerRequest = class(TNJServerChildClass)
  end;

  TNJCustomServerResponse = class(TNJServerChildClass)
  end;

  TNJCustomServer = class(TObject)
  private
    FHandle:  THandle;
    FActive:  boolean;
    FPort:    integer;
  protected
    procedure BeforeStart;virtual;
    procedure AfterStart;virtual;
    procedure BeforeStop;virtual;
    procedure AfterStop;virtual;
  protected
    procedure StartServer;virtual;
    procedure StopServer;virtual;
    function  GetActive: boolean;virtual;
    procedure SetActive(const Value: boolean);virtual;
    function  GetHandle: THandle; virtual;
    procedure SetHandle(const Value: THandle); virtual;
    function  GetPort: integer;virtual;
    procedure SetPort(const Value: integer);virtual;
  public
    property  OnAfterServerStarted: TNJServerAfterStartedEvent;
    property  OnAfterServerStopped: TNJServerAfterStoppedEvent;
    property  OnBeforeServerStarted: TNJServerBeforeStartEvent;
    property  OnBeforeServerStopped: TNJServerBeforeStopEvent;

    property  Active: boolean read GetActive write SetActive;
    property  Port: integer read GetPort write SetPort;

    procedure Start;virtual;
    procedure Stop;virtual;
  end;

  // Base exception for HTTP server(s)
  ENJHttpServerError = class(ENJServerError);

  // Http request-object
  TNJHttpRequest = class(TNJCustomServerRequest)
  private
    FEncoding:  string;
  protected
    function    GetHeaders: TJsonObject;virtual;
    function    GetTrailers: TJsonObject;virtual;

    procedure   SetEncoding(const Value: string); virtual;
    function    GetEncoding: string; virtual;
  public
    property    Socket: JNodeSocket read ( JServerRequest(Handle).connection );
    property    Encoding: string read GetEncoding write SetEncoding;
    property    &Method: string read ( Handle.&method );
    property    Url: string read ( Handle.url );
    property    Headers: TJsonObject read GetHeaders;
    property    Trailers: TJsonObject read GetTrailers;
    property    HttpVersion: string read ( Handle. httpVersion );

    procedure   Pause; virtual;
    procedure   Resume; virtual;

    constructor Create(const Server: TNJCustomServer;
                const RequestObject: JServerRequest); reintroduce; virtual;
  end;

  // Http response-object
  TNJHttpResponse = class(TNJCustomServerRequest)
  protected
    function  GetSendDate: boolean; virtual;
    procedure SetSendDate(const Value: boolean);virtual;
  public
    property  StatusCode: integer read (Handle.statusCode) write (Handle.statusCode);
    property  SendDate: boolean read GetSendDate write SetSendDate;

    function  GetHeader(const Name: string): string;
    procedure SetHeader(const Name: string; const Value: string);
    procedure RemoveHeader(const Name: string);

    function  Write(const Text: string): boolean;overload;
    function  Write(const Text: string; const Encoding: string): boolean;overload;
    procedure Write(const Stream: TStream); overload;
    procedure Write(const Buffer: TBinaryData); overload;

    procedure &End(const Buffer: TBinaryData); overload;
    procedure &End(const Data: variant); overload;
    procedure &End(const Data: variant; const Encoding: string); overload;
    procedure &End(const Stream: TStream);overload;
    procedure &End(const Stream: TStream; const Encoding: string); overload;

    constructor Create(const Server: TNJCustomServer;
                const ResponseObject: JServerResponse); reintroduce; virtual;
  end;

  TNJHTTPServerRequestEvent = procedure (Sender: TObject;
    const Request: TNJHttpRequest;
    const Response: TNJHttpResponse);

  TNJHTTPServer = class(TNJCustomServer)
  private
    procedure InternalSetActive(const Value: boolean);
  protected
    procedure Dispatch(request: JServerRequest;
              response: JServerResponse); virtual;
  protected
    procedure SetActive(const Value: boolean);override;
    procedure StartServer;override;
    procedure StopServer;override;
  public
    property  Instance: JServer read ( JServer(GetHandle));
  published
    property  OnRequest: TNJHTTPServerRequestEvent;
  end;

  TNJWebSocketSocket = class(TObject)
  private
    FSocket:  JWsSocket;
    FServer:  TNJWebSocketServer;
  protected
    function  GetReadyState: JWsReadyState; virtual;
    function  GetSocketName: string; virtual;
    function  GetSocketRequest: TNJHttpRequest; virtual;
  public
    property  ReadyState: JWsReadyState read GetReadyState;
    property  Name: string read GetSocketName;
    property  Server: TNJWebSocketServer read FServer;
    property  Request: TNJHttpRequest read GetSocketRequest;

    property  OnSocketClose: TNJWebSocketSocketNotifyEvent;
    property  OnSocketOpen: TNJWebSocketSocketNotifyEvent;
    property  OnMessage: TNJWebSocketSocketMessageEvent;

    procedure Emit(EventName: string; Data: variant; Attempts: integer);

    constructor Create(const Server: TNJWebSocketServer;
                const WsSocket: JWsSocket); virtual;
    destructor Destroy;override;
  end;

  TNJWebSocketServerTextMessageEvent = procedure (const Sender: TNJWebSocketServer; const Info: TNJWebsocketMessageInfo);
  TNJWebSocketServerBinaryMessageEvent = procedure (const Sender: TNJWebSocketServer; const Info: TNJWebsocketMessageInfo);
  TNJWebSocketServerClientConnected = procedure (const Sender: TNJWebSocketServer; const Socket: JWsSocket);
  TNJWebSocketServerClientDisconnected = procedure (const Sender: TNJWebSocketServer; const Socket: JWsSocket);

  TNJWebSocketOnHandler = procedure (const Socket: JWsSocket; const Data: variant);

  TNJWebSocketServer = class(TNJCustomServer)
  private
    FOnConnected: TNJWebSocketServerClientConnected;
    FOnDisconnected: TNJWebSocketServerClientDisconnected;
    FOnTextMessage: TNJWebSocketServerTextMessageEvent;
    FOnBinMessage: TNJWebSocketServerBinaryMessageEvent;
    FTrack: boolean;
    FPath: string;
    procedure InternalSetActive(const Value: boolean);
  protected
    procedure SetPath(URLPath: string); virtual;
    procedure SetTracking(Value: boolean); virtual;
  protected
    procedure Dispatch(const Data: TNJWebsocketMessageInfo); virtual;
    procedure SetActive(const Value: boolean);override;
    procedure StartServer;override;
    procedure StopServer;override;
  public
    property  Path: string read FPath write SetPath;
    property  ClientTracking: boolean read FTrack write SetTracking;
    procedure Emit(EventName: string; Data: variant; Attempts: integer);
    procedure On(EventName: string; CallBack: TNJWebSocketOnHandler);
  published
    property OnClientConnected: TNJWebSocketServerClientConnected read FOnConnected write FOnConnected;
    property OnClientDisconnected: TNJWebSocketServerClientDisconnected read FOnDisconnected write FOnDisconnected;
    property OnTextMessage: TNJWebSocketServerTextMessageEvent read FOnTextMessage write FOnTextMessage;
    property OnBinMessage: TNJWebSocketServerBinaryMessageEvent read FOnBinMessage write FOnBinMessage;
  end;
I could do this all day. So yeah, there is going to be a few changes. A lot of changes. And you will be amazed at how much cool stuff you can do! While I love all the cool new stuff thats going into SmartCL (the visual application types) I must admit that working with node.js and IOT is what really gives me a kick these days. When it takes less than 1 minute to write a server that can scale, execute in fork or cluster mode and daisy-chained – all of it while making use of the latest technology and API’s — then you have some firepower to play with.
So stay tuned for more, much more 🙂
The never ending story, PirateLogic evidence claims
Seems like this train never really stops. Despite me telling my side of the story, people still have a hard time believing that Pilot Logic have been so blatantly bad when it comes breaking the law. Not just with my libraries but also with code belonging to Embarcadero.
Back up my claims? Fine.
Fine. I have just uploaded two compare files (out of several) which shows a 1:1 compare between Embarcadero owned VGScene and PL_Orca. If you still think my colleagues and myself lack evidence, then you simply need to download Codetyphon and all its available packages (especially those >= 2 years old) and look at it yourself. Hopefully this will be enough to prove my point.

No wonder they got upset when we started to dig into their codebase. This is just one of many where license violations is the new standard.
You can download two HTML reports from our file-compare analysis here: http://quartexhq.myasustor.com/piratelogic/piratelogic.rar
Orca = VgScene = Firemonkey
Needless to say, several people have taken an interest in this case. I am happy that most of those are positive and understand both why I got upset with PilotLogic and also why I wanted to inform the Freepascal and Lazarus forums about the dodgy practices. PL has close ties to the FPC community after all. Why sit and watch a disease infect a healthy codebase?

Considering Orca is a VGScene renamed and 99.9% of the codebase is pure VGScene without change — Sternas is lying his head off. This is a clean copyright violation of Embarcadero IP.
And no, I did not set out to defend this or that – but when people call me a liar without even considering that I may be telling the truth, then I must be given a chance to defend myself. And my motivation was absolutely not to “eliminate the competition” (like some people amazingly declare). What competition? I use Delphi for native work and Smart Pascal for JavaScript. What the hell would Codetyphon have to offer? And why on earth would I be against it when I advocate both freepascal and Delphi pretty much 24/7. The more object pascal compilers and systems the better!
How would you respond when you submit a complaint about your code being taken, and the moderator laughs at you and start to post the address of where you children live? Is that ok in your book? I would imagine most men would respond rather “instinctively” when faced with such actions.

I am so tempted to post the whole nest of pigs, but I will leave it with this. If you have any more questions, just download and investigate the codebase yourself. They have no doubt covered some of their tracks by now – but not all of them.
When the response you get from the lead-coder of Codetyphon when posting valid questions about illegal use of your software, broken licenses and piracy is “close and delete topic” – then I guess that says it all.

You are a bully Sternas. But when you hit me, I will hit back. Bullies don’t seem to like that very much huh?
Piracy kills more than companies, it kills the spirit
With regards to the notion that I somehow sent my complaints to PilotLogic because I was coding a new IDE, I have this to say:
Do you know how long it takes to write a usable IDE? It’s not something you slap together over the weekend. The more complex the behavior you want to deliver, the more work needs to be invested. Lazarus have gone through what? A decade of work before it’s finally reaching a point where it’s polished and stable? Smart Mobile Studio is almost five years old, and the designer still needs plenty of work. The fact that we do live rendering of the UI in separate processes makes it much harder than a vanilla “Delphi” like designer.
It takes time to develop a professional IDE. You know why? Because you have to go through the whole evolution of thought. You end up refactoring as the approach, ideas and concepts mature. The alternative is, like Pilot Logic has done, to take the shortcut: to steal the code rather than go through the evolution themselves. To really work on it and figure it out yourself.
If I removed all moral reservations, ignored and disrespected the months and years invested by others, by friends and companies synonymous with object pascal and the community I am part of and love so much – I could probably make an IDE more or less identical to Delphi in a couple of months. If I could just steal code from TMS, Developer Express, Elevate Software and Lazarus and completely ignore the energy and time their products represent – then life would be much easier. Or would it?
But I can’t do that. I’m not wired like that. Sure I have used a pirated copy of something in my life. Im not even going to deny that. But I have always saved up, months if I have to, and bought every single one.
How could I look these people in the eye at some Delphi meetup or congregation knowing that I have robbed them of weeks, months and years? I would not be able to hold my head up straight in shame. Because when you buy a source-code license, it’s not just a “use and throw away” thing. It is a contract of trust, and a legal and moral obligation to use the technology they have offered you within the bounds of their wishes.
I still remember how tired and utterly exhausted I was after releasing Smart Mobile Studio 1.0. I had worked night and day for over a year. Weekends, nights; I’m pretty sure that product broke my marriage to be honest. I even took out a second mortgage on our house. And I was so proud that despite all the challenges involved, despite all the negative people who said it was impossible we found a way and made it happen!
And I was heartbroken when only weeks after the release I found a cracked version of Smart on DelphiFan.com. They must have taken them a couple of weeks at least to crack it, because they had given up on writing a keygen. HexLicense uses non-linear numbers so ordinary brute-force attacks are rarely successful. On closer inspection I noticed that they had disassembled the whole executable and painstakingly isolated enough code, even padded the executable to make the checksum match. So nothing is un-crackable.The only thing you can do is to buy a window of time before it happens. That window is what makes or breaks your income.
What really gutted me was discovering that people I talked with quite often was responsible for this (one of the hackers was a member of Delphi Developer). Over a year of testing, prototyping, co-operation between Eric Grange and myself – not to mention all the work Jørn Angeltveit from Optimale Systemer had done. He also helped finance the project for 12 long months. We even set the price as low as we possibly could just to make sure piracy would not become an issue. Then a prodigy coder from asia, one that talked friendly with me on a weekly basis, a person I had helped with his Delphi code – decided to allocate time just to destroy our solo release. For what? Five minutes of fame? I would have given him a free copy if he asked me. In fact, I have given away almost as many copies as we have sold. Primarily to kids and people who are in a bad financial spot but who wants to learn pascal.
I can understand that people use pirated software, no problem. But when you see up front the amount of damage it does, especially for a small company – you have to be heartless to continue.
Two weeks is what we got. I lost my house, everything. I had to start from scratch. But it was worth it, every bit of it. Because they said it could not be done.
And that my IDE work, both public and in the labs should in any way pose a threat to Lazarus or Codetyphon, is ridicules. I have a full-time job, two kids and my girlfriend, Smart Mobile Studio on the side – and I have recently started my own company. Not much time left for plotting evil schemes. Darth Vader very thin on the ground. But just why would I want to? What kind of place do you come from where people ruin other people’s work like that? It’s not how I was raised that’s for sure. I just wanted the copyright header in my own code to remain. And it would be nice if you asked rather than just misrepresent my work it as your own. I can’t even believe this is a debate.
Add to that the injury i got 3 years ago when i broke my spine in two places. This has impacted my ability to commute. I have had to say no to several high profile jobs because I would not be able to give 100%. So I declined rather than being a burden. So what kind of person would I be if I sat here plotting to destroy something for others, just to win myself. That is against everything I believe in. And the amount of code, papers and help I have issued over the years should at least give me the benefit of the doubt. Because I havent charged a dime for any of it.
Nor do I sit here and pity myself like a child. If you want it, you will find a way! I was not supposed to walk either – but I’m walking. Funny how the impossible seem to happen around people who refuse to give up. Yet curses rip to pieces the man that fears the dark. Shoot me, stab me, but I will still come after you. No force in nature is stronger than the will of a person who believe in himself. Except the same force in reverse for those that lack vision. All the power of the world is in your own mind. And I will keep doing the impossible until the day that I die – because I can.
End of case
I did not want Pilot Logic’s tendencies to infect Lazarus or freepascal, which it would almost certainly have done had we not blown the whistle on this. So in a way we did succeed. But at a personal cost we should not have had to pay.
Hopefully this time it will stick and the drama factor mellows out.
Raspberry PI fun
Just got this box in the mail, now just waiting for a my new touch-screens. Looks like I got the weekend covered.

There was a small LCD screen that came with the kit. I will be putting that in my Amiga 500 retro-mod. Will try to wire it up so that every time i start a game or program – the title of the executable will scroll over the display.
This will involve a fpc compiled signal bridge, but I may be able to do the whole thing in node.js. On the Amiga side of things a task dump running on interrupt should be enough to catch the filename, then broadcast it via UDP on localhost. That way the Linux side of things can pick up the data -and push the text to the display.
Nerdvana..

You must be logged in to post a comment.